This is the 4th post in the bookdesign series. Previous posts in this series:
By default, the running headers in a two-sided book (resp. article) produced by LaTeX displays the chapter (resp. section) number + title and the page number on even pages; and the page number and section (resp. subsection) number + title on odd pages. On chapter pages, however, the running header is blank, and the page number is displayed in the centre of the footer.
All these default headers and footers can be customised, either with the facilities already provided by the memoir class, or via the fancyhdr package. Basically, you need to redefine the "plain" pagestyle for chapter pages, and the "headings" pagestyle for the non-chapter pages. Using memoir, you'd do something like
\makeevenhead{plain}{left}{centre}{right}
\makeoddhead{plain}{left}{centre}{right}
\makeevenfoot{plain}{left}{centre}{right}
\makeoddfoot{plain}{left}{centre}{right}
% respectively \makeevenhead{headings}...
\makeoddhead{plain}{left}{centre}{right}
\makeevenfoot{plain}{left}{centre}{right}
\makeoddfoot{plain}{left}{centre}{right}
% respectively \makeevenhead{headings}...
While if you're using the fancyhdr package:
\fancypagestyle{plain}{
%% Clear all headers and footers
\fancyhf{}
%% e.g. if right footers on odd pages and left footers
%% on even pages are some content:
\fancyfoot[RO,LE]{...}
%% this applies to right headers on odd pages:
\fancyhead[RO]{...}
%% and this to left headers on even pages:
\fancyhead[LE]{...}
%% and this to centre headers on both even and odd:
\fancyhead[C]{...}
}
\fancypagestyle{headings}{...}
As always, see the respective manuals/user guides for extensive instructions.
Here are some examples of what I've done:

(Download links of the .tex source files are at the end of this post)
Here are my specs:
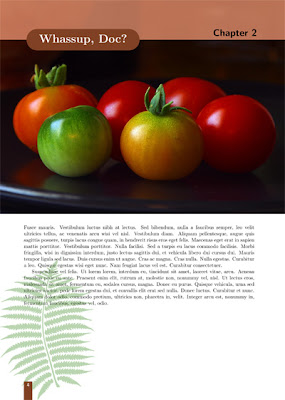
- On chapter pages:
- page number in a coloured box on the right in the footer on odd pages;
- ditto, but on the left in the footer on even pages;
- blank running headers.
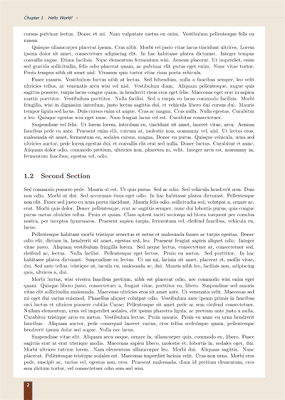
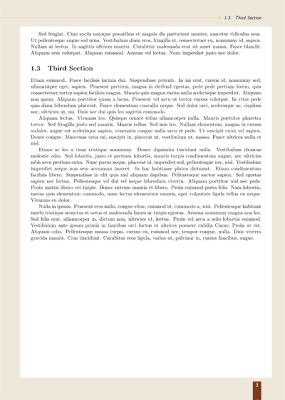
- On non-chapter pages:
- same footers as above;
- on even pages, the chapter title on the left in the header, and a decorative line extending to the right all the way to the paper margin;
- on odd pages, the section title on the right in the header, and a decorative line extending to the left all the way to the paper margin.
You'll probably notice that on the non-chapter pages, I've got some coloured background going on, too. I could've used the wallpaper package to achieve this effect, but just for kicks, I did them using the tikz package, using the headings pagestyle as a hook.
So here are the .tex source (plus the public domain images used) for producing the sample pages above:
Note that my examples require wallpaper.sty v2.5. If you're using MikTeX, your wallpaper.sty is most likely v2.4, so you'll have to grab the latest version yourself.

